728x90
반응형
2021/04/01(목)
자바스크립트를 활용하여 영상처리 프로젝트 : 첫 메인 화면 구현(첫 슬라이드)

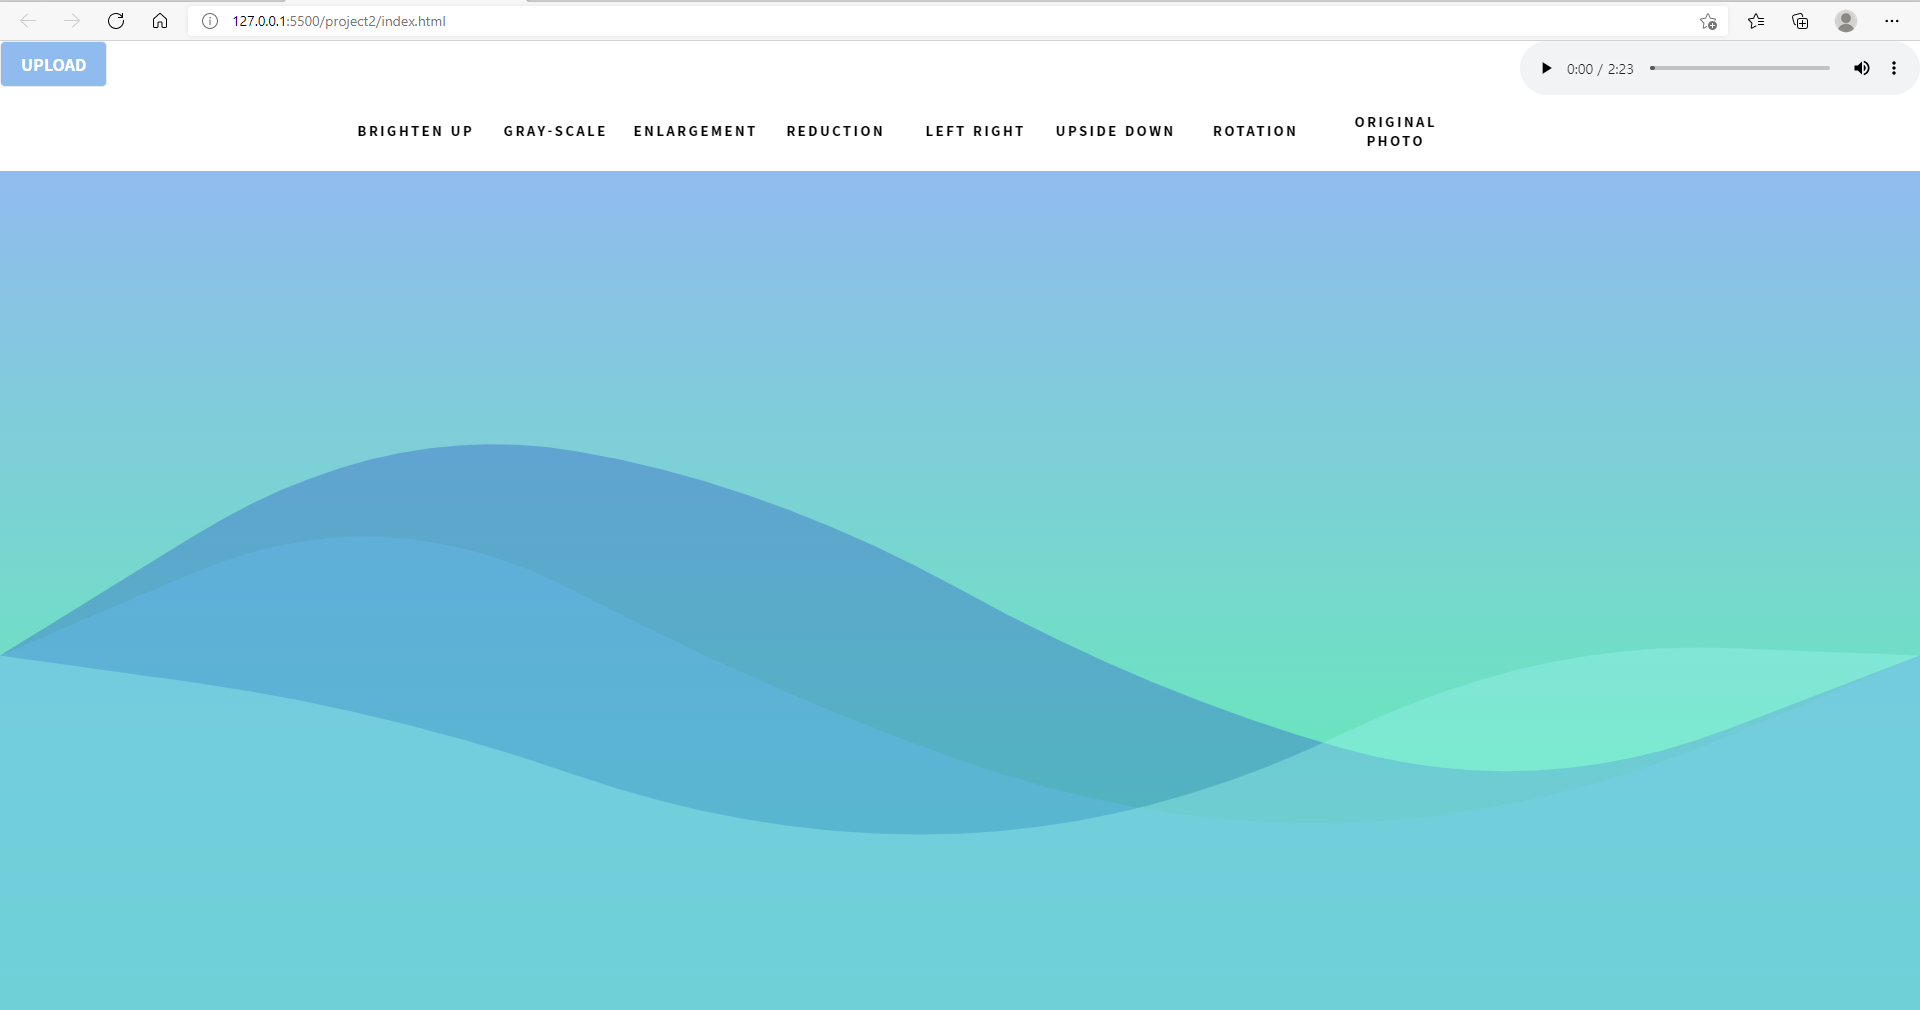
<메인화면의 구성>
index.html이라는 메인html 위에 물결이 치는 모습을 구현한 module을 크기에 맞게 띄우기
index.html에서 띄운 캔버스는 fixed를 주워 웹 페이지 화면에 고정 시켜줌
캔버스는 투명하게 설정하여 파일이 캔버스에 올라가지 않았을 때 뒤에 app.js화면만 보이도록 구성

<app.js>
import { WaveGroup } from "./wavegroup.js";
// import { AddCanvas } from "./addcanvas.js";


export class App {
    constructor() {
        this.canvas = document.createElement('canvas');
        this.ctx = this.canvas.getContext('2d');
        document.body.appendChild(this.canvas);

        //웨이브 생성
        this.waveGroup = new WaveGroup();

        window.addEventListener('resize', this.resize.bind(this), false);
        this.resize();

        requestAnimationFrame(this.animate.bind(this));

        this.waterDrop();


    }

    resize() {


        this.stageWidth = document.body.clientWidth;
        this.stageHeight = document.body.clientHeight;

        this.canvas.width = this.stageWidth;
        this.canvas.height = this.stageHeight;


        this.waveGroup.resize(this.stageWidth, this.stageHeight);

    }

    animate(t) {

        //초기화
        this.ctx.clearRect(0, 0, this.stageWidth, this.stageHeight);

        this.waveGroup.draw(this.ctx);

        requestAnimationFrame(this.animate.bind(this));
    }

}
window.onload = () => {
    new App();
}
간략히 설명하자면
웹에 크기에 맞는 캔버스를 띄운다.
일직선으로 6개의 점을 찍는다 위아래로 다른 스피드로 움직이게 한다
삼각함수를 이용해서 점을 연결하면 웨이브 완성
<wavegroup.js>
import { Wave } from "./wave.js";

export class WaveGroup {
    constructor() {

        //총 웨이브수와 점을 몇개 그릴것인지
        this.totalWaves = 3;
        this.totalPoints = 6;

        //색지정
        this.color = ['rgba(49,99,201,0.4)', 'rgba(100,185,236,0.4)', 'rgba(149,242,235,0.4)'];
        this.waves = [];

        //총 웨이브 수만큼 웨이브 생성
        for (let i = 0; i < this.totalWaves; i++) {
            const wave = new Wave(
                i,
                this.totalPoints,
                this.color[i],

            );
            this.waves[i] = wave;
        }
    }

    //각각의 함수가 콜이 되면 토탈웨이브 만큼의 함수를 수행
    resize(stageWidth, stageHeight) {
        for (let i = 0; i < this.totalWaves; i++) {
            const wave = this.waves[i];
            wave.resize(stageWidth, stageHeight);
        }

    }

    draw(ctx) {
        for (let i = 0; i < this.totalWaves; i++) {
            const wave = this.waves[i];
            wave.draw(ctx);
        }
    }
}
<wave.js>
import {
    Point
} from './point.js'

export class Wave {
    constructor(index, totalPoints, color) {
        //고유 인덱스 번호를 넣어줘서 웨이브가 차이를 두고 움직일 수 있게 하기 위해
        this.index = index;
        this.totalPoints = totalPoints;
        this.color = color;
        this.points = [];
    }

    resize(stageWidth, stageHeight) {
        this.stageWidth = stageWidth;
        this.stageHeight = stageHeight;

        this.centerX = stageWidth / 2;
        this.centerY = stageHeight / 2;

        //포인트 넓이 (총 스테이지 넓이에서 totalpoint수만큼 나눈 값)
        this.pointGap = this.stageWidth / (this.totalPoints - 1);
        this.init();
    }

    init() {
        this.points = [];
        for (let i = 0; i < this.totalPoints; i++) {
            const point = new Point(
                this.index + i,
                this.pointGap * i,
                this.centerY,
            );
            this.points[i] = point;
        }
    }

    draw(ctx) {
        ctx.beginPath();
        ctx.fillStyle = this.color;


        let prevX = this.points[0].x;
        let prevY = this.points[0].y;

        ctx.moveTo(prevX, prevY);

        //처음과 마지막 포인트는 움직이지 않게 설정
        //처음과 마지막을 제외한 포인트는 업데이트를 하여 움직이도록 설정
        for (let i = 1; i < this.totalPoints; i++) {
            if (i < this.totalPoints - 1) {
                this.points[i].update();
            }

            const cx = (prevX + this.points[i].x) / 2;
            const cy = (prevY + this.points[i].y) / 2;

            //곡선으로 연결
            ctx.quadraticCurveTo(prevX, prevY, cx, cy);


            prevX = this.points[i].x;
            prevY = this.points[i].y;
        }

        //이전 포인트 x,y 좌표에 현재 포이트의 x,y좌표를 반으로 나눈값, 즉 중간값을 적어줌
        //lineTo는 직선그리기
        ctx.lineTo(prevX, prevY);
        ctx.lineTo(this.stageWidth, this.stageHeight);
        ctx.lineTo(this.points[0].x, this.stageHeight);
        ctx.fill();
        ctx.closePath();
    }
}
<point.js>
export class Point {
    constructor(index, x, y) {
        //this.x =x;
        this.x = x;
        this.y = y;
        this.fixedY = y;
        this.speed = 0.09;

        //현재포인트가 몇번째 포인트인지 알게하기 위해
        this.cur = index;
        this.max = Math.random() * 100 + 150;
    }

    update() {
        this.cur += this.speed;
        this.y = this.fixedY + (Math.sin(this.cur) * this.max);
    }
}
화면에 들어가는 영상처리 알고리즘은 다른 게시물에서 다뤄보도록 하겠다
참고 : 인터렉티브 디벨로퍼
https://www.youtube.com/user/cmiscm
Interactive Developer
코드로 만드는 애니메이션, 영감, 실리콘밸리의 생활과 해외취업에 대해 이야기 합니다. https://blog.cmiscm.com/
www.youtube.com
728x90
반응형
'코딩 연습장 > Javascript' 카테고리의 다른 글
| 자바스크립트를 이용한 개인 프로젝트 - 4(코코coco 화면) (0) | 2021.06.13 |
|---|---|
| 자바스크립트를 이용한 개인 프로젝트 - 3(업up 화면) (0) | 2021.06.13 |
| 자바스크립트 이용한 개인 프로젝트 - 1(첫 화면, 슬라이드 화면) (0) | 2021.05.16 |
| 자바스크립트 영상 처리 코딩 (0) | 2021.03.24 |
| Visual Studio Code설치(HTML5사용) (0) | 2021.03.19 |